How to Use
This guide explains how to use the Innosend integration in your daily operations.
Customer Experience
Checkout with Pickup Points
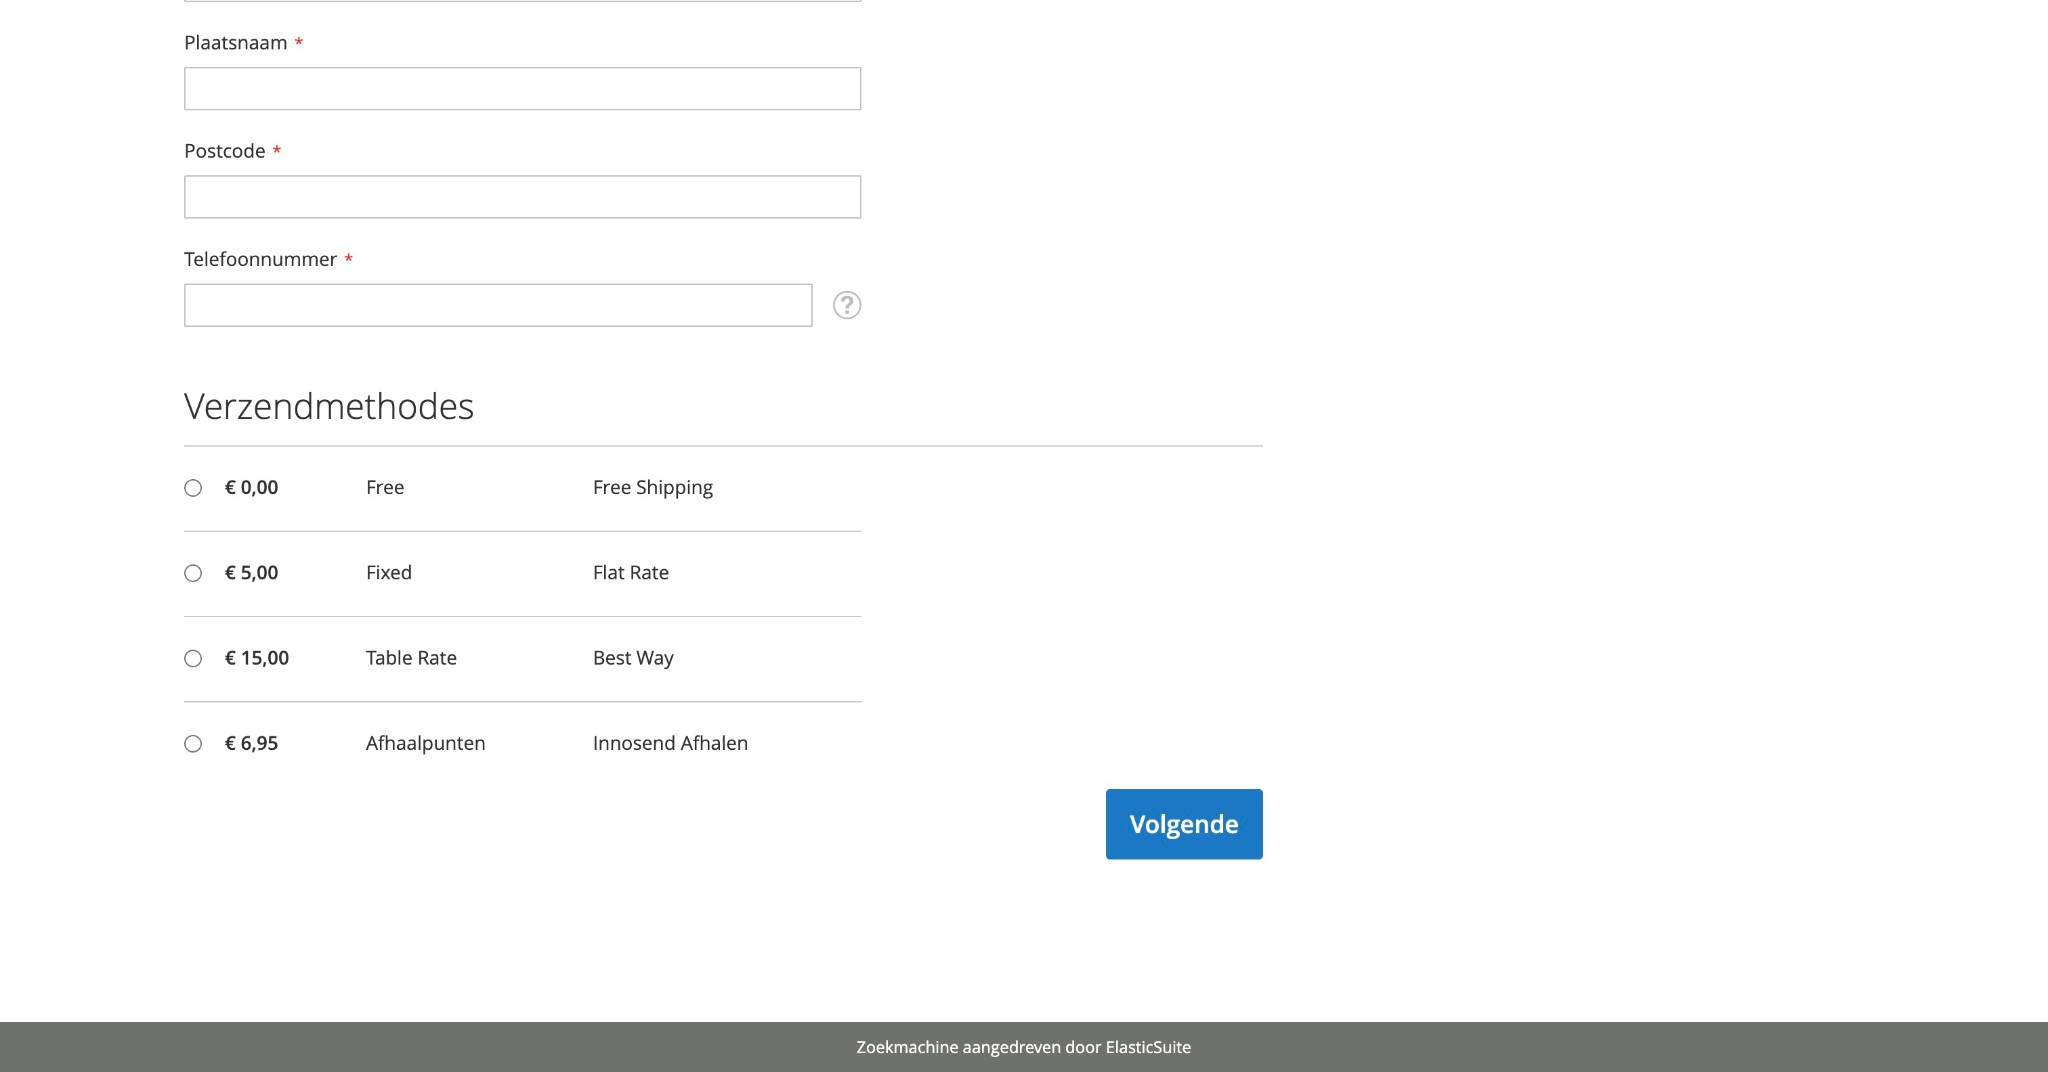
When a customer reaches the checkout shipping step:
- Enter Shipping Address
- Customer first enters their address data (city, postcode, phone number)
- The shipping methods only appear after this information is entered
-
The system automatically geocodes the address
-
Select Shipping Method
- Customer sees the available shipping methods, including "Innosend Afhalen" (Pickup Points)
- Selecting the Pickup Points option shows available pickup points
- The nearest pickup point is automatically selected based on the entered address
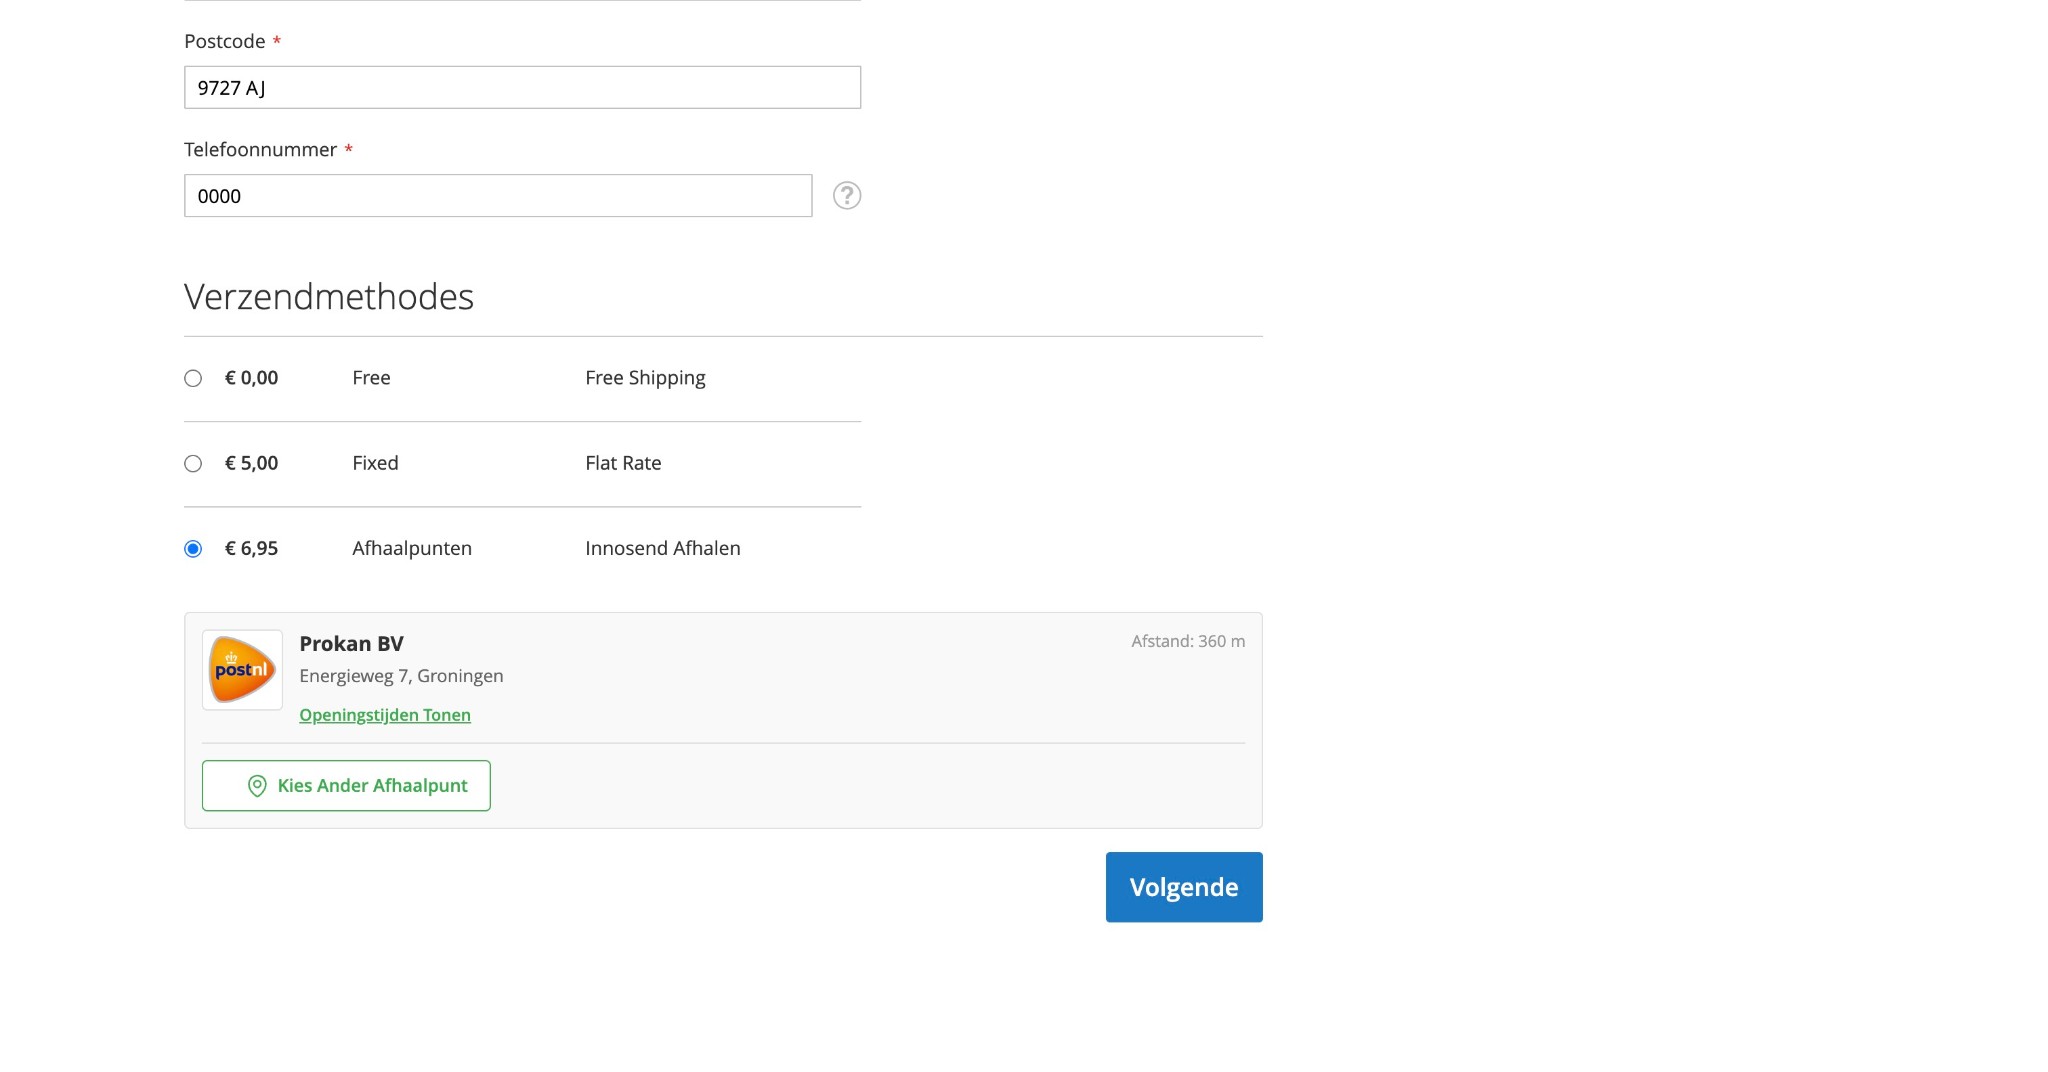
- Choose Pickup Point
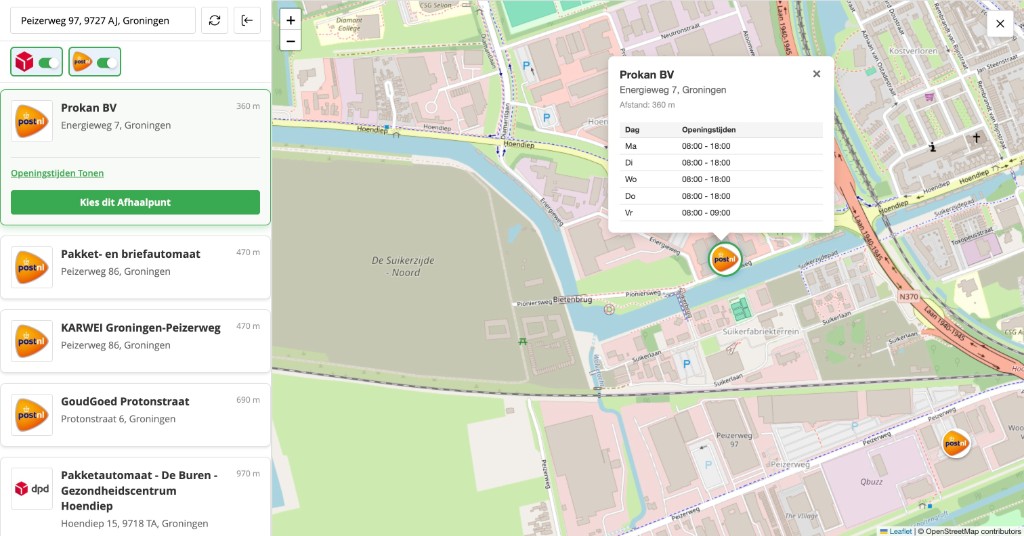
- Click "Choose Another Pickup Point" to open a modal
- The modal loads nearby pickup points on an interactive map (OpenStreetMap/Leaflet)
- Left panel: search by address, filter by carrier (PostNL, DPD, etc.), list of pickup points with distance and opening hours
- Right panel: map with markers for each pickup point
- Customer can select a different pickup point and click "Choose this Pickup Point"
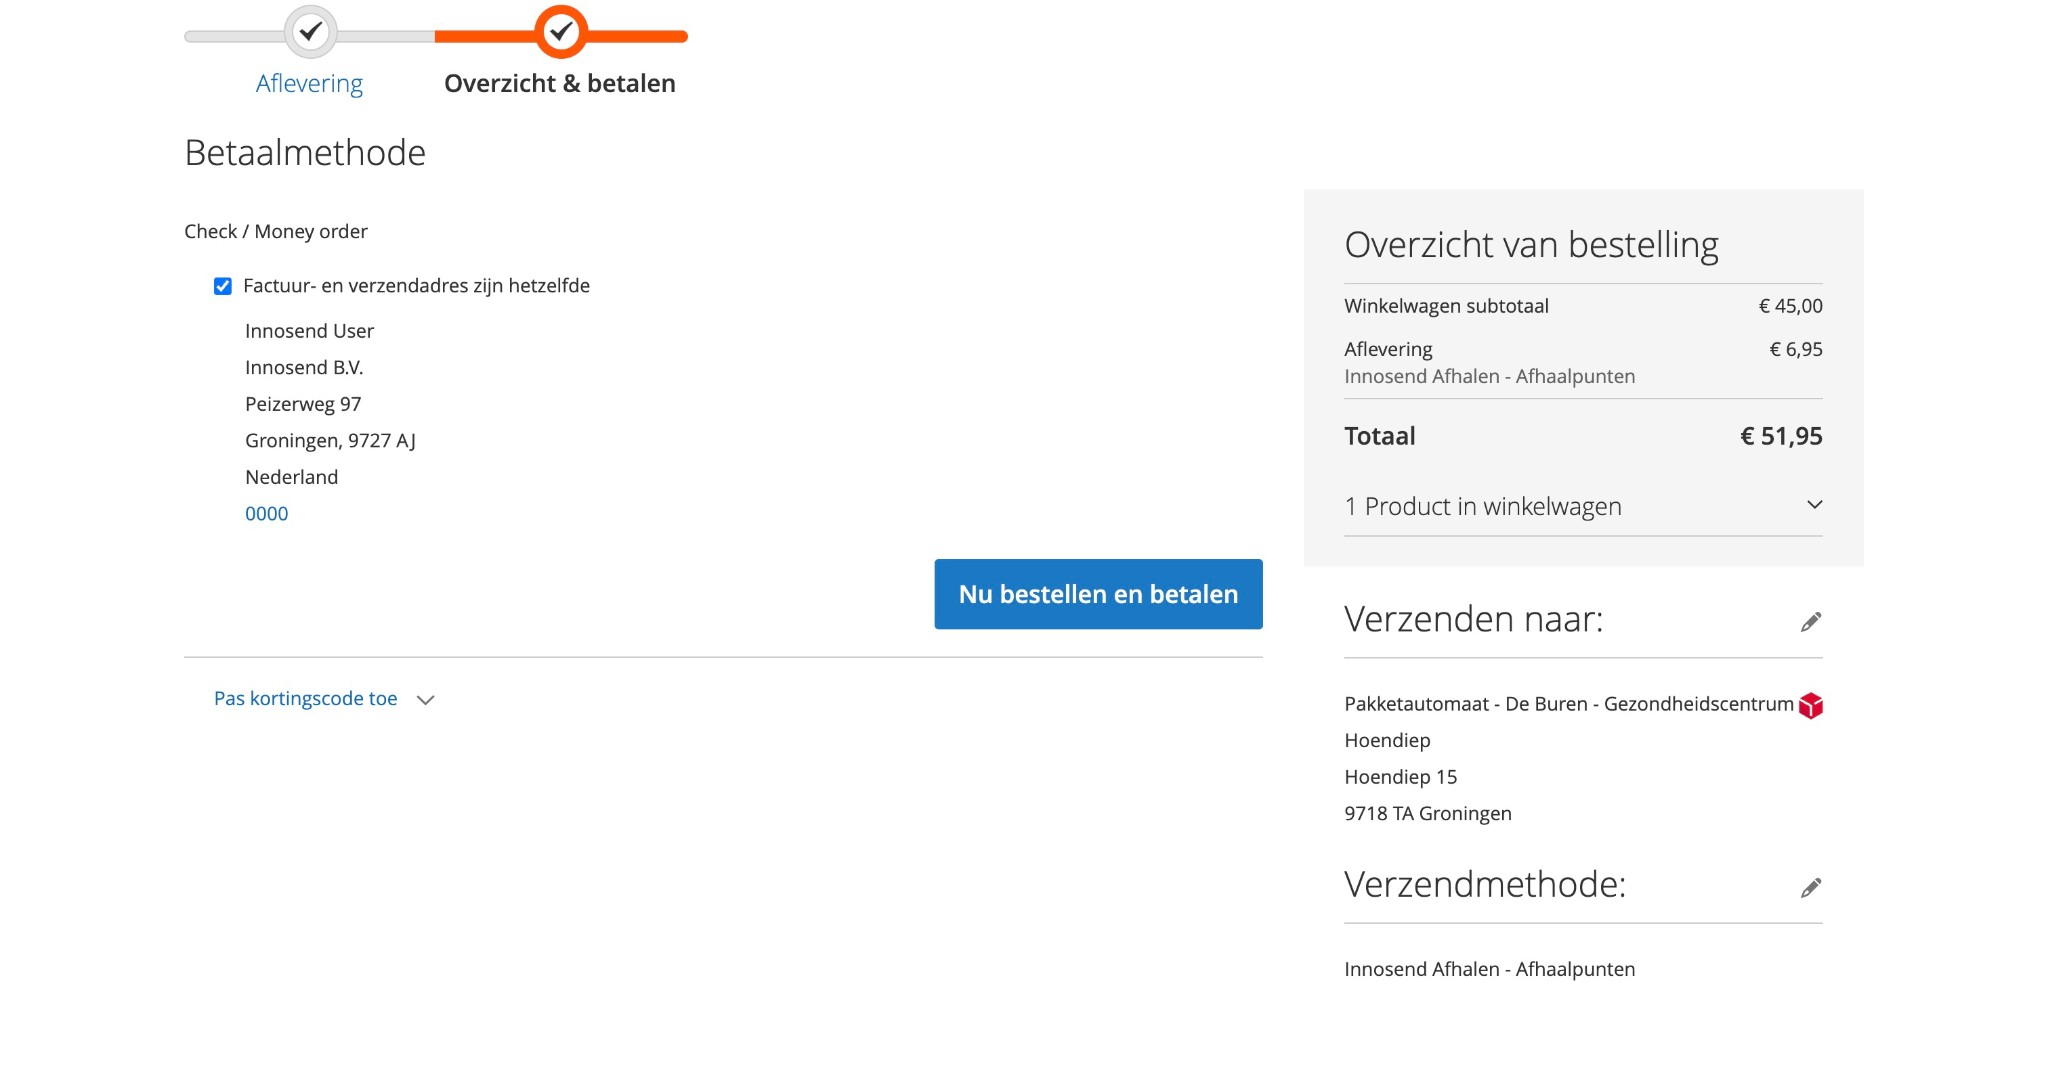
- Complete Order
- On the "Overview & pay" step, the selected pickup point is neatly shown in the order overview
- The pickup point name and address appear under "Verzenden naar" (Ship to)
- The shipping method "Innosend Afhalen - Afhaalpunten" is confirmed in the summary
- Selected pickup point is saved with the order
- Customer receives confirmation with pickup point details
Pickup Point Modal Features
| Feature | Description |
|---|---|
| List View | Scrollable list of pickup points with details |
| Map View | Interactive map with markers for each location |
| Search | Search by postal code or city |
| Filter | Filter by carrier (PostNL, DHL, etc.) |
| Details | View opening hours, address, and distance |
| Selection | Click to select a pickup point |
Store Admin Operations
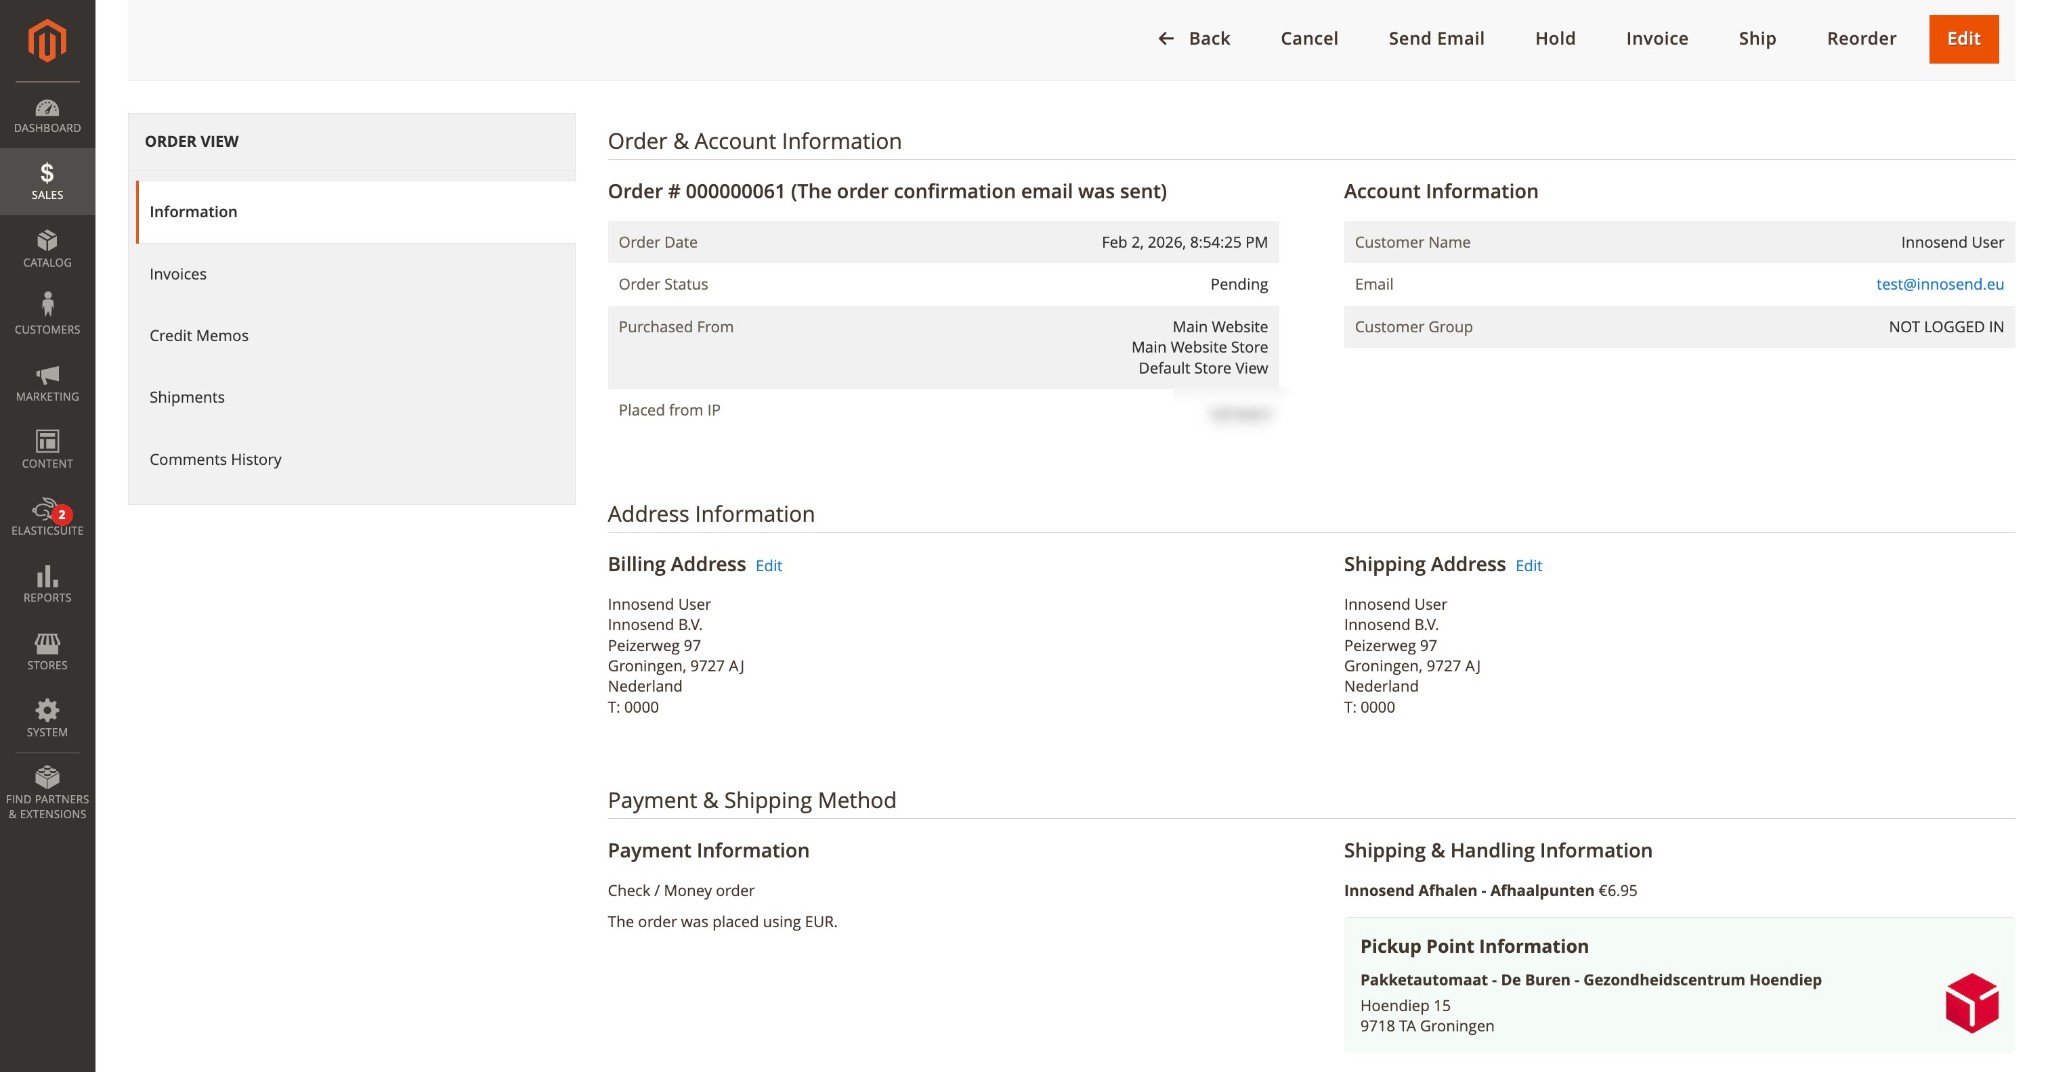
Viewing Orders with Pickup Points
- Go to Sales → Orders
- Open an order
- The chosen pickup point is neatly displayed in the Pickup Point Information section:
- Selected pickup point name (e.g. Pakketautomaat - De Buren - Gezondheidscentrum Hoendiep)
- Pickup point address
- Carrier icon and shipping method (Innosend Afhalen - Afhaalpunten)
Order Information Display
The pickup point information is neatly displayed in:
- Order view in admin – Shows "Pickup Point Information" section with chosen point and address
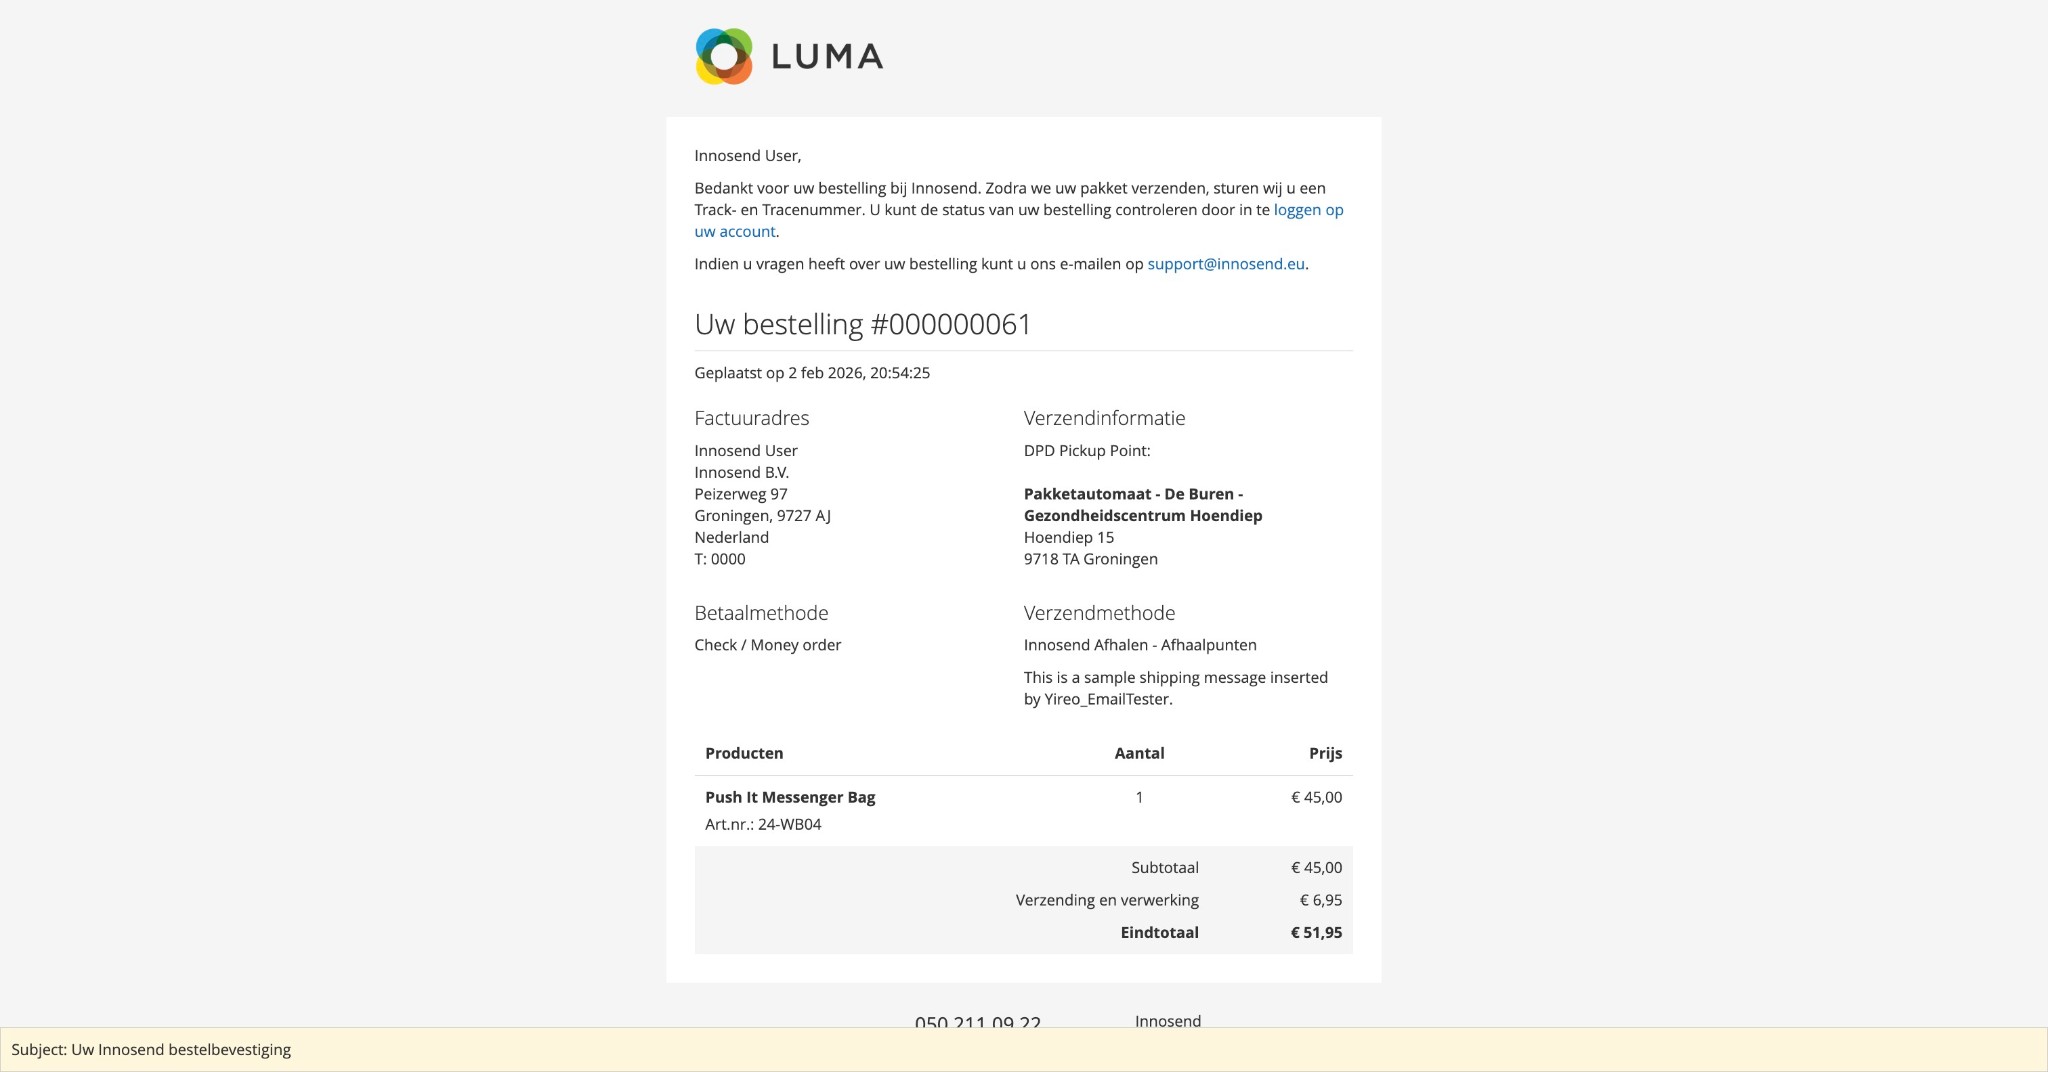
- Order confirmation emails – Pickup point displayed in "Verzendinformatie" (Shipping Information)
- Packing slips – Pickup point included on printed documents
- Invoices – Address details included
Checking Order Sync Status
- Go to Sales → Orders
- Check the order notes for sync status
- View logs at
var/log/system.logfor detailed sync information
API Health Monitoring
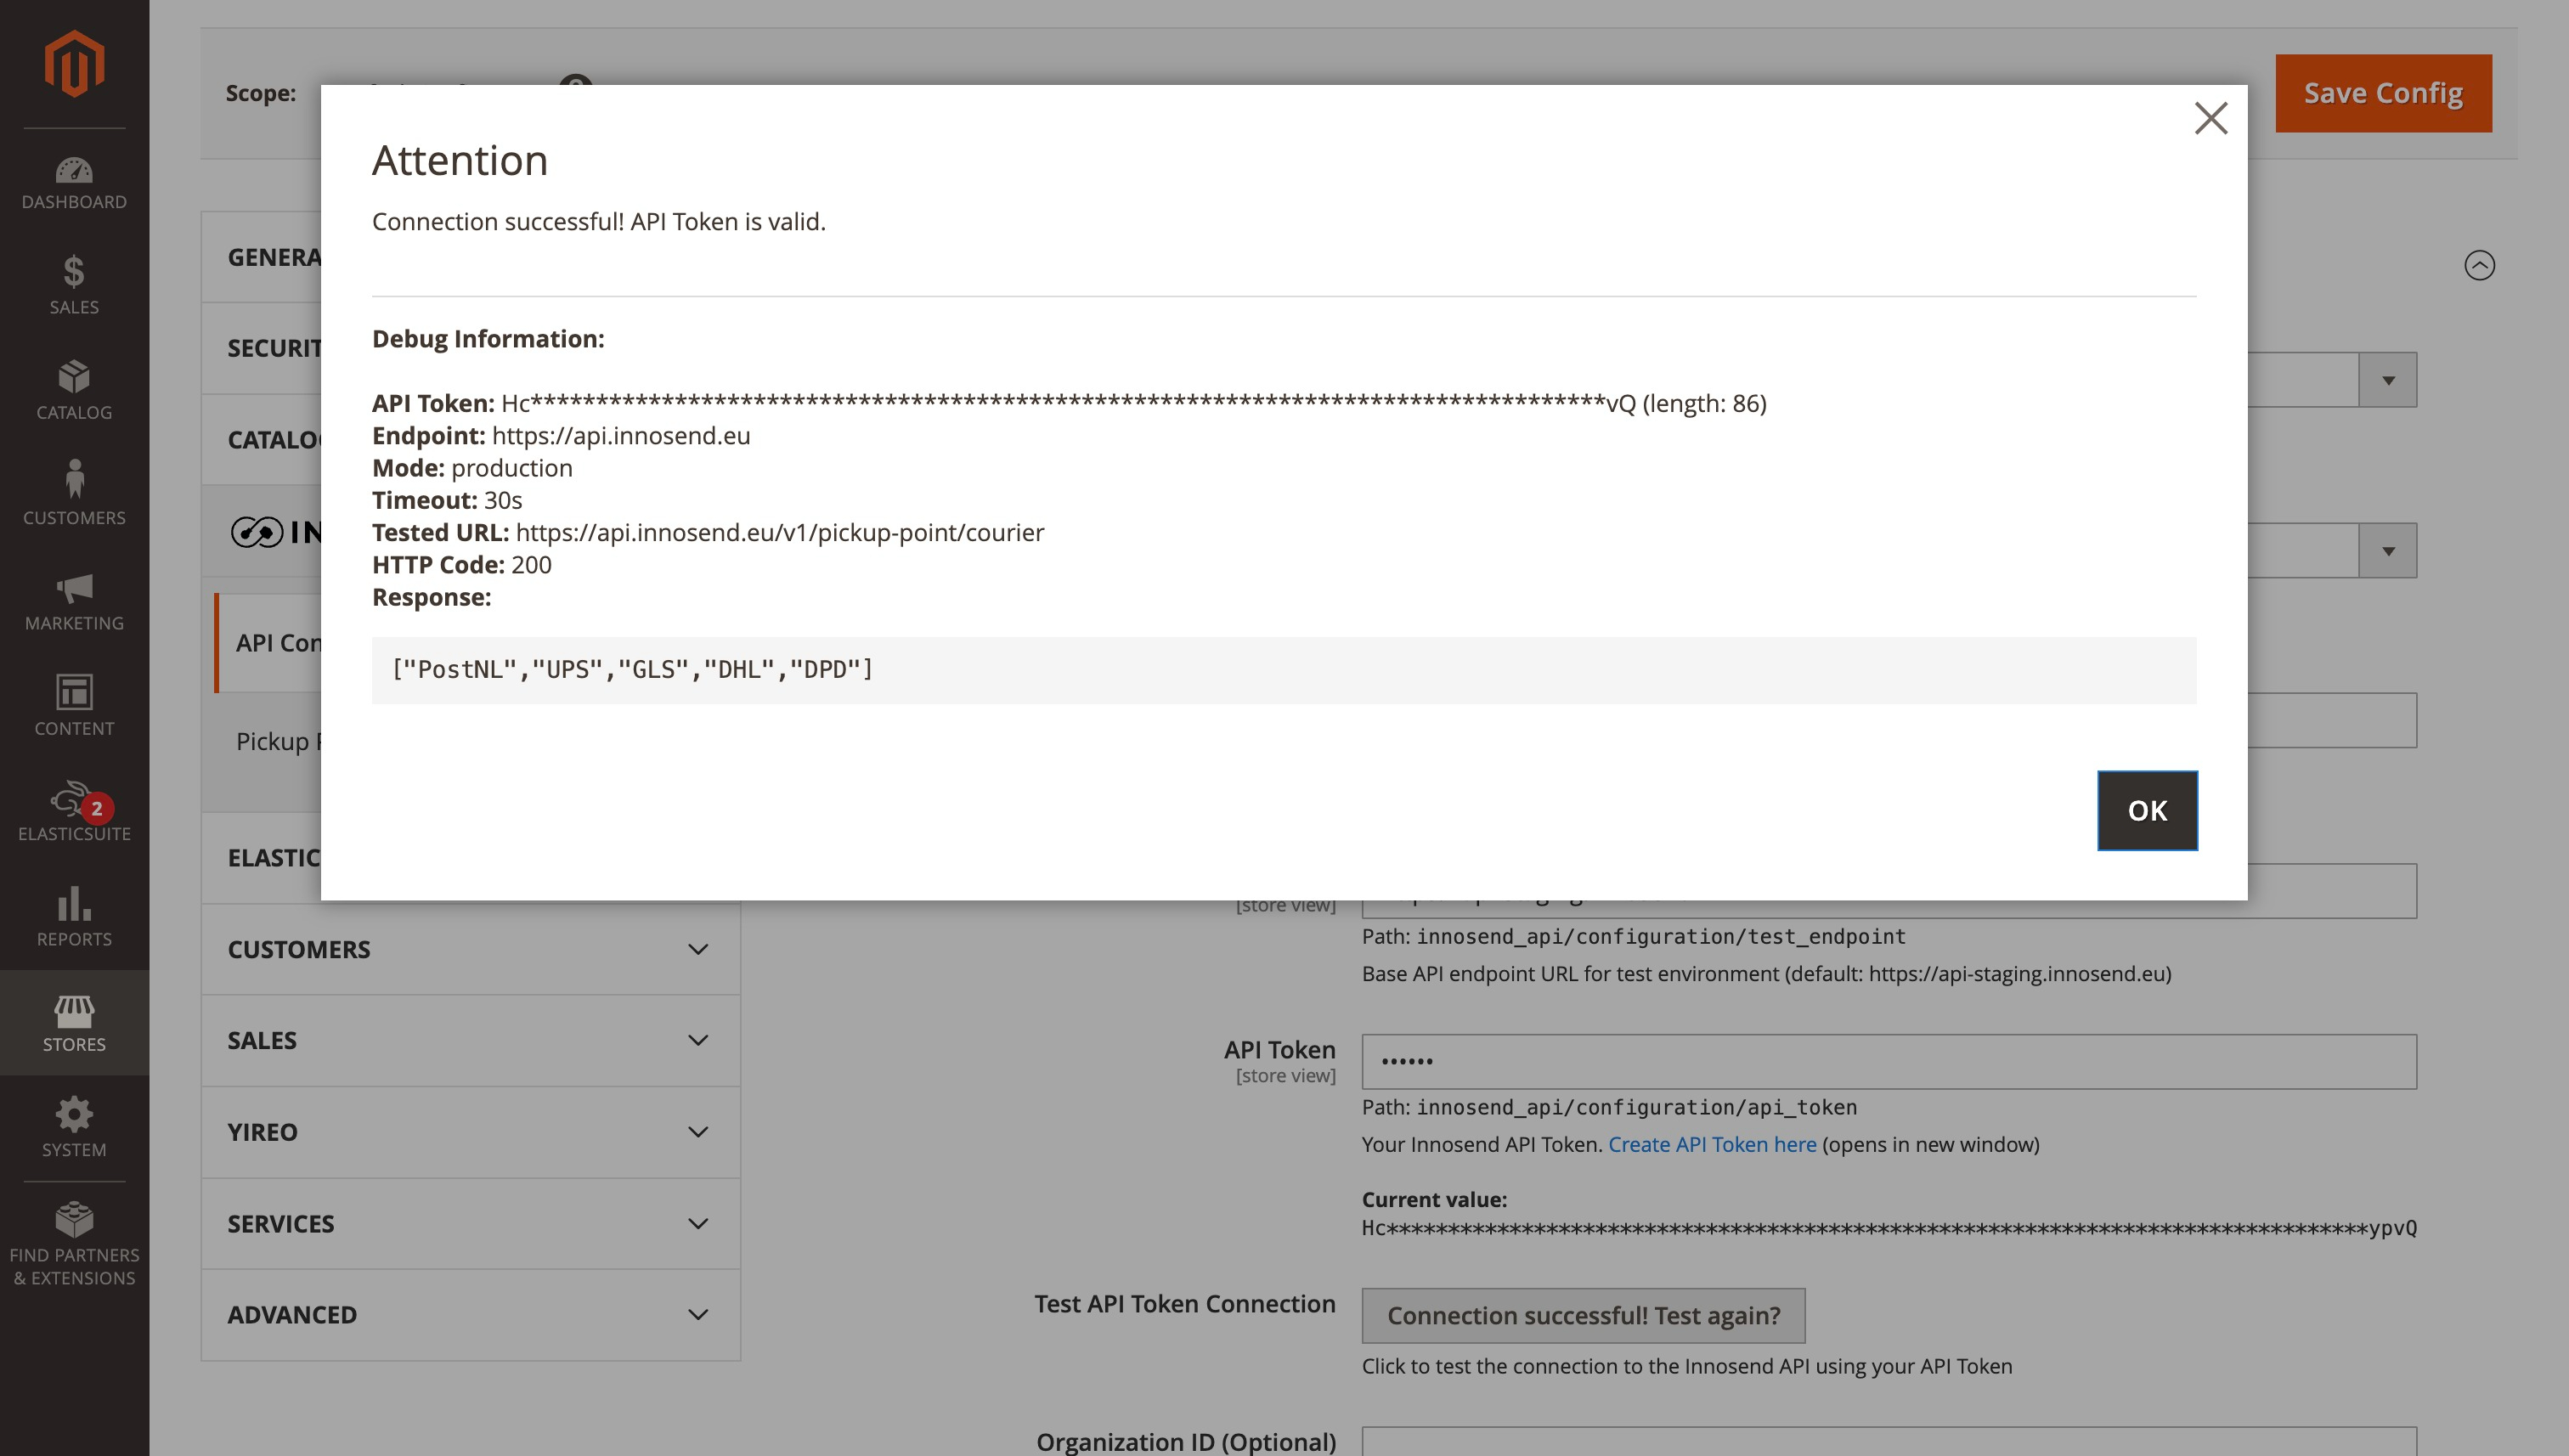
Testing API Connection
- Go to Stores → Configuration → Innosend → API Configuration
- Click Test Connection
- A success or error message will appear. On success, you'll see "Connection successful! API credentials are valid." with debug information (endpoint, HTTP code, response).
Healthcheck Endpoint
The module provides a public healthcheck endpoint:
Success Response:
Error Response:
Order Synchronization
Automatic Synchronization
When enabled, orders are automatically synced to Innosend when:
- An order is placed (if "Sync on Order Place" is enabled)
- Cron runs the retry job (for failed syncs)
Manual Synchronization
Currently, orders are synced automatically. Manual sync functionality via the admin panel is planned for a future release.
Coming Soon
A one-click order import feature is being developed that will allow:
- Bulk order sync from the order grid
- Manual sync button on individual orders
- Simplified integration setup
Monitoring Sync Status
Check order sync status in:
- Magento Logs
var/log/system.log- General sync messages-
var/log/exception.log- Errors and exceptions -
Innosend Dashboard
- View synced orders at dashboard.innosend.eu
Status and Tracking Updates
Automatic Status Sync
When enabled, the module automatically:
- Fetches tracking numbers from Innosend
- Updates order status based on shipment status
- Creates shipment records with tracking information
Status Mapping
| Innosend Status | Magento Action |
|---|---|
| Shipped | Create shipment with tracking |
| Delivered | Update to complete (configurable) |
| Failed Delivery | Log notification |
Email Notifications
Order Confirmation
Pickup point information is automatically included in:
- Order confirmation emails
- Shipment notification emails
The following variables are available in email templates:
{{var order.getExtensionAttributes().getPickupPoint().getName()}}
{{var order.getExtensionAttributes().getPickupPoint().getAddress()}}
{{var order.getExtensionAttributes().getPickupPoint().getCity()}}
Reports and Analytics
Available Data
Track your Innosend shipping data:
| Metric | Location |
|---|---|
| Orders with pickup points | Sales → Orders (filter by shipping method) |
| Popular pickup locations | Innosend Dashboard |
| Sync success rate | Magento logs |
| Carrier usage | Innosend Dashboard |
Multi-Store Configuration
Different Settings per Store
You can configure different settings for each store view:
- Go to any configuration section
- Select the Store View from the scope selector (top-left)
- Uncheck "Use Website" to override settings
- Save configuration
Common Multi-Store Scenarios
| Scenario | Configuration |
|---|---|
| Different carriers per region | Set Allowed Carriers per store view |
| Different API credentials per brand | Configure API settings per website |
| Enable/disable pickup points per store | Toggle Enable Pickup Points per store |
Cron Jobs
The module registers the following cron jobs:
| Job | Schedule | Description |
|---|---|---|
innosend_sync_orders |
Every 5 minutes | Retry failed order syncs |
innosend_status_sync |
Configurable | Sync status and tracking updates |
Verify Cron is Running
# Check cron status
php bin/magento cron:run --group=default

# View scheduled jobs
php bin/magento cron:status
Best Practices
Performance
- Cache Management
- Clear cache after configuration changes
-
Use Varnish or Redis for production
-
API Calls
- Pickup points are fetched on-demand
- Results are not cached to ensure fresh data
Security
- API Credentials
- Use read-only tokens for production deployments
- Rotate API credentials periodically
-
Never commit credentials to version control
-
Allow Write Operations
- Keep disabled in test environments
- Only enable in production when ready
Monitoring
- Regular Checks
- Monitor
var/log/system.logfor errors - Check Innosend Dashboard for sync status
-
Test API connection periodically
-
Alerts
- Set up log monitoring for API errors
- Monitor cron job execution
Common Workflows
New Store Setup
- Install modules
- Configure API credentials
- Test connection
- Enable pickup points
- Configure shipping method pricing
- Enable order sync
- Place test order
- Verify in Innosend Dashboard
Going Live
- Switch Mode from Test to Live
- Enable "Allow Write Operations"
- Clear all caches
- Verify API connection
- Monitor first production orders
Troubleshooting an Order
- Check order details for pickup point info
- View order notes for sync status
- Check
var/log/system.logfor related errors - Verify order exists in Innosend Dashboard
- Contact support if issues persist